
How to Create an IBC Registration using PIERS
• This tutorial is for Researchers.
• In this tutorial, you will learn:
• How to login to the Online IBC System (Slide 2)
• How to initiate a new IBC registration (Slides 3 – 7)
• How to find your IBC number (Slide 8)
• How to delegate editing privileges to a lab member (Slides 14 – 17)
• How to fill out the IBC registration (Slides 4 – 37)
• How to submit the IBC registration for pre-review (Slides 35 – 37)
• How to make modifications after pre-review (Slides 38 – 42)
• How to certify the registration (Slides 43 – 44)
1

Navigate to the online IBC system: https://apps.research.upenn.edu/login. To log in, click on
the “Login with PennKey” button and enter your PennKey and password. Two-factor
authentication is required.
Click here to login
2

To initiate a new registration, hover over the “IBC” button (1). Click “IBC New Registration”
from the drop-down menu (2).
1. Hover over the “IBC” button
2. Click “IBC New Registration”
3

On the “Initial IBC Registration” page, provide a unique and detailed title. Fill in the PI box with
the PI’s name. Click the “This registration will involve” box to view the drop-down menu.
Click here to view the drop-down menu
4

From the drop-down menu, select what the registration will involve. Choose "Creating Transgenic Animals" when registering
the creation of transgenic mice. Choose "Crossing and/or Using Transgenic Animals" when registering crossing mice at ABSL-2
or higher containment OR when creating, crossing, or using transgenic flies, worms, or ants. Choose "Generating and/or Using
rsNA Materials" when registering viral vectors, CRISPR/Cas9, or mRNA-LNP. Choose "Generating and/or Using Transgenic
Plants" when registering the creation, crossing, or use of transgenic plants.
Select what the registration
will involve from the menu
5

Because “Generating and/or Using rsNA materials” was chosen, the “rsNA” box has appeared. Click on the “rsNA”
box to choose what material will be used. Scroll down to view the “Other” material which includes Naked
DNA/RNA, Plasmid, Modified Microorganism, Modified Cells, and Other. If you choose “Other” below the “Other”
material option, you will be asked to describe the material in an additional box.
6

Enter the name of the Biosafety Officer with whom you are working (1). If you are not yet
working with a Biosafety Officer, you may leave it blank. Click the “Continue” button to
continue filling out the registration form (2).
1. Enter name of a Biosafety Officer
2. Click here to continue
7

The new registration has been created. Notice the “Panel shortcuts” on the left. This panel
will help you navigate the form. Also notice that a new IBC number has been generated.
Your new IBC number
8

Continue filling out the “Project Information” section by providing a Detailed Project
Description.
Provide a detailed
project description
9

Below the project description box, click “Add Lab Location” to add the location of your lab
where this work will occur.
Click here to add lab location
10

The “Lab Location” box will pop up. Start typing the lab location in the “Building” box (1) and
choose the correct building from the drop-down menu (2).
1. Start typing building name here
2. Choose the correct building from menu
11
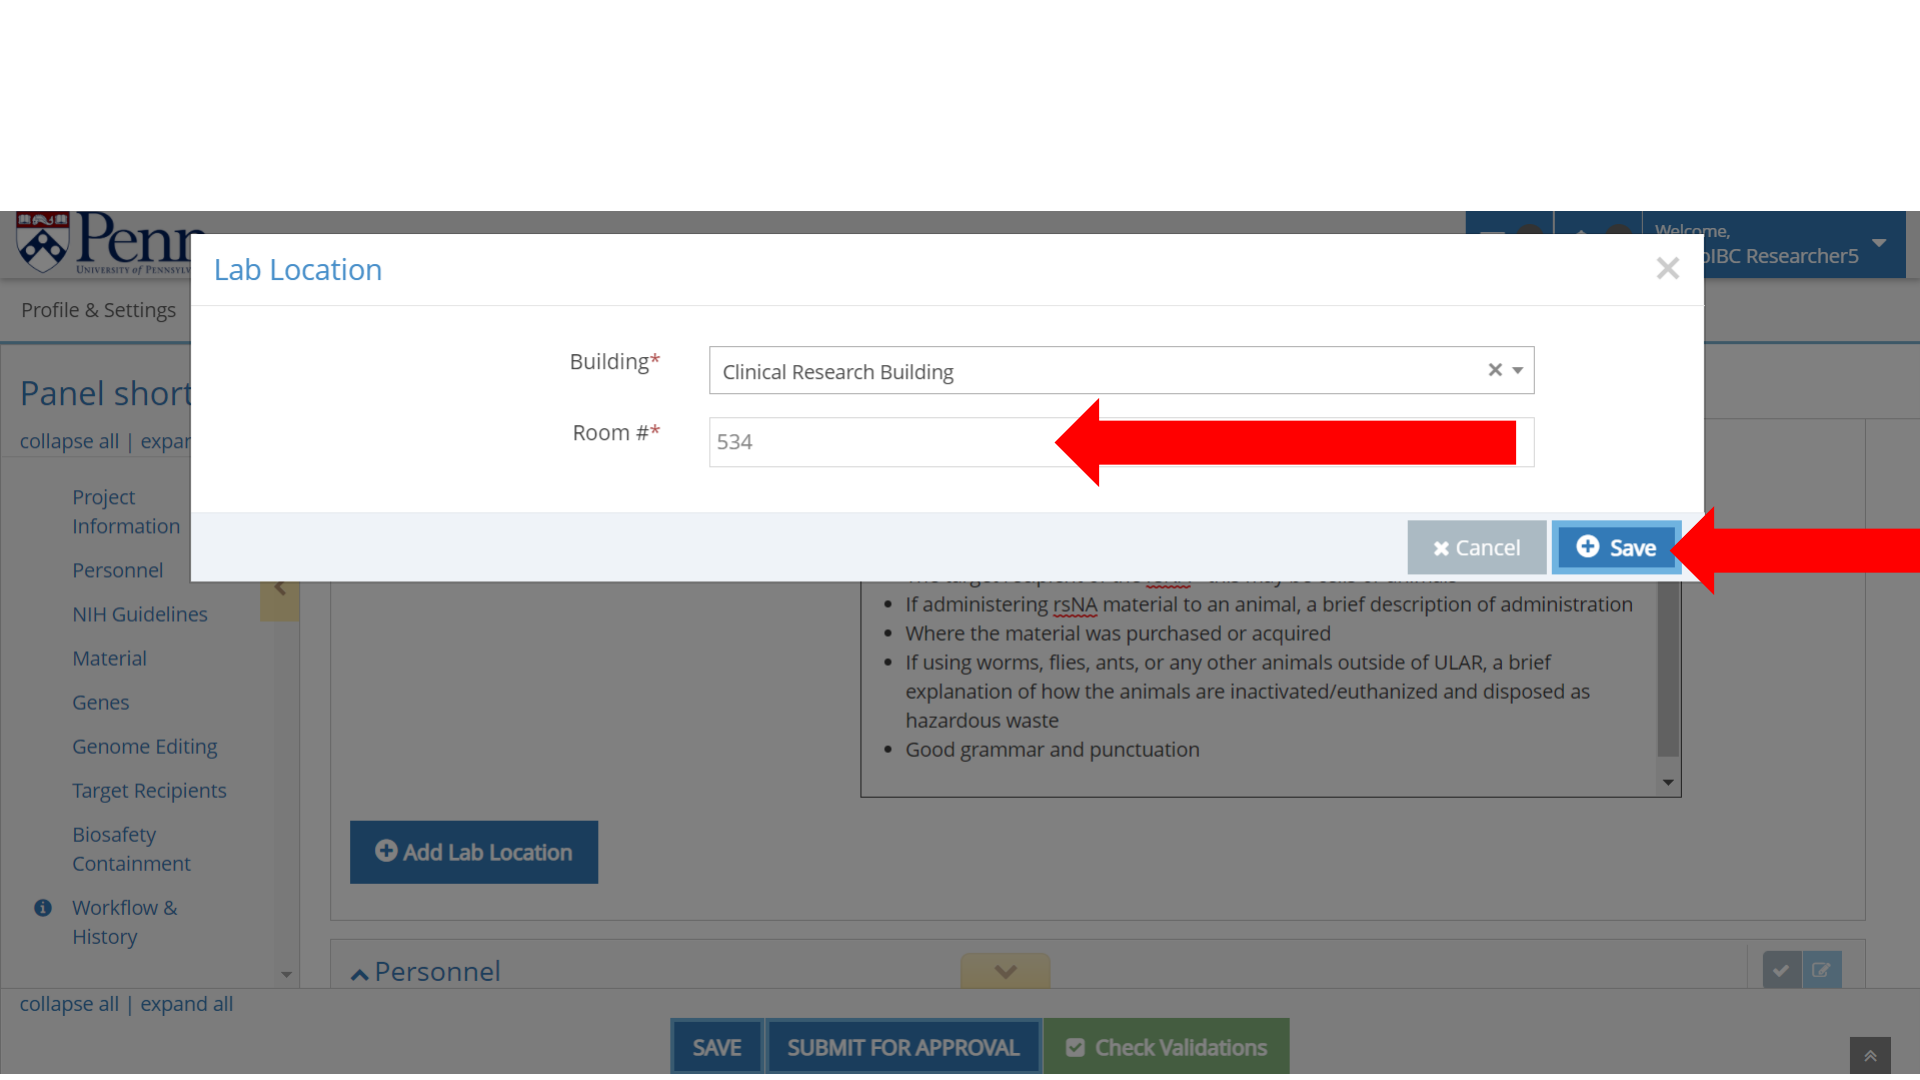
Enter the room number in the “Room #” box (1). Click the “Save” button (2).
1. Enter room number here
2. Click Save
12

The lab location has been added. If necessary, you may add additional lab locations.
13

Scroll down or click on the “Personnel” link in the panel shortcuts to navigate to the
“Personnel” section. The PI is automatically listed as personnel. To add additional personnel,
click on the “Add Project Personnel” button.
Click here to add personnel
14

The “Project Personnel” box will pop up. Add the personnel affiliation by clicking the
appropriate circle (“University of Pennsylvania” for Penn people or “Other” for everyone
outside of the university).
Choose University Affiliation
15

If you choose “University of Pennsylvania”, the “Personnel name” box will appear. Start typing
the name using the person’s PennKey/email address.
Enter PennKey here
16

Choose the appropriate name. Click the “Edit permission” box if you wish to give this person
editing permission (1). Click the “Save” button to add the person to the personnel list (2).
1. Grant editing permission here
2. Click Save
17

If the person is not affiliated with Penn, click “Other” (1). The “Project Personnel” box will
expand. Fill out the required information (2) before clicking the “Save” button (3) at the end
of the form to add the person.
1. Click here if person is not affiliated with Penn
2. Fill out
required
information
3. Click
Save
18

Required training (Recombinant or Synthetic Nucleic Acid Guidelines) is automatically checked
for Penn affiliated personnel. All people handling the material should be listed as project
personnel.
Status of required training
19

Scroll down or click on the “NIH Guidelines” link in the Panel shortcuts. Choose the appropriate
registration category(s) by checking the box next to the appropriate category(s). For more information
on this, please see the Experiments Covered by the NIH Guidelines starting on page 17 of the NIH
Guidelines: https://osp.od.nih.gov/wp-content/uploads/NIH_Guidelines.pdf
20

If necessary, scroll down through the NIH Guidelines. Click on the boxes next to the
appropriate selections.
21

Scroll down or click “Material” in the Panel shortcuts. Fill out the section appropriately. Add the
vector map by clicking on the purple “Drop files here or click to choose” button. Vector maps
must be png, jpeg, doc, or pdf files.
Click here to add vector maps
22

Scroll down or click “Genes” in the Panel shortcuts. To add genes to the registration, click the
“Add Gene” button. Alternatively, if the project includes many gene targets, an Excel
Spreadsheet may be uploaded by clicking on the “Drop file here or click to choose” button.
Click here to add genes individually
OR Upload an excel spreadsheet of
genes, their biological activity, and
species origin
23

If you add genes individually, the “Gene” box will pop up. Fill out the required information (1)
before clicking the “Save” button (2) to add the gene to the registration.
1. Enter the
appropriate
information
2. Click Save
24

The gene has been added to the registration. If necessary, add additional genes by repeating
these steps. If changes are needed for a specific gene, click on the blue pencil box to make
edits or the red trash can button to delete the gene entry. Complete the “Gene” section.
25

Scroll down or click “Genome Editing” in the Panel shortcuts. Respond “Yes” or “No” to the genome editing technology
question. If you are using genome editing technology, additional boxes will appear. Fill out the information. To add genomic
targets, click the “Add Genomic Target” box OR add an excel spread of genomic targets, their biological activities, species
origin of the target, and the functional consequence of the editing by clicking the “Drop file here or click to choose” box.
Click here to add genomic targets individually
OR Click here to add spreadsheet of targets
26

The “Target” box will pop up. Fill out the appropriate information. Multiple selections may be
made for the “Functional Consequence” by clicking more than one option from the drop-
down menu.
Multiple options available!
27

Click “Save” to add the genomic target to the registration. Continue adding genomic targets.
Click here
28

Choose the “Method of Delivery” for the Nuclease and the Guide RNA from the drop-down
menus that appear after clicking on the boxes.
29

If viral vector is selected, select the type of viral vector for Nuclease and Guide RNA delivery
from the drop-down menus. Answer the remaining question.
30

Scroll down or click the “Target Recipients” link in the Panel shortcuts. Choose the appropriate targets and fill out
the required information. If using animals, please answer “Yes” or “No” to the privately owned animals question.
Privately owned animals are animals enrolled in clinical studies in the Vet School. This designation does not apply
to research animals like mice or rats.
31

Scroll down or click “Biosafety Containment” from the Panel shortcuts. Choose the appropriate
containment from the drop-down menu for the Biosafety Level (BSL) and Animal Biosafety
Level (ABSL).
Choose the appropriate containment level
32

Multiple containment levels may be selected. If more than one containment level is selected,
an explanation in the “Comments” box must be provided.
Provide comments here if two levels are selected
33

Scroll down or click “Additional review” in the Panel shortcuts. Provide the required
information for the additional review.
Provide the IACUC protocol number(s) where
the IBC registration number will be used
34

With all sections complete, click the “Check Validations” button to check if the registration is
truly complete.
35
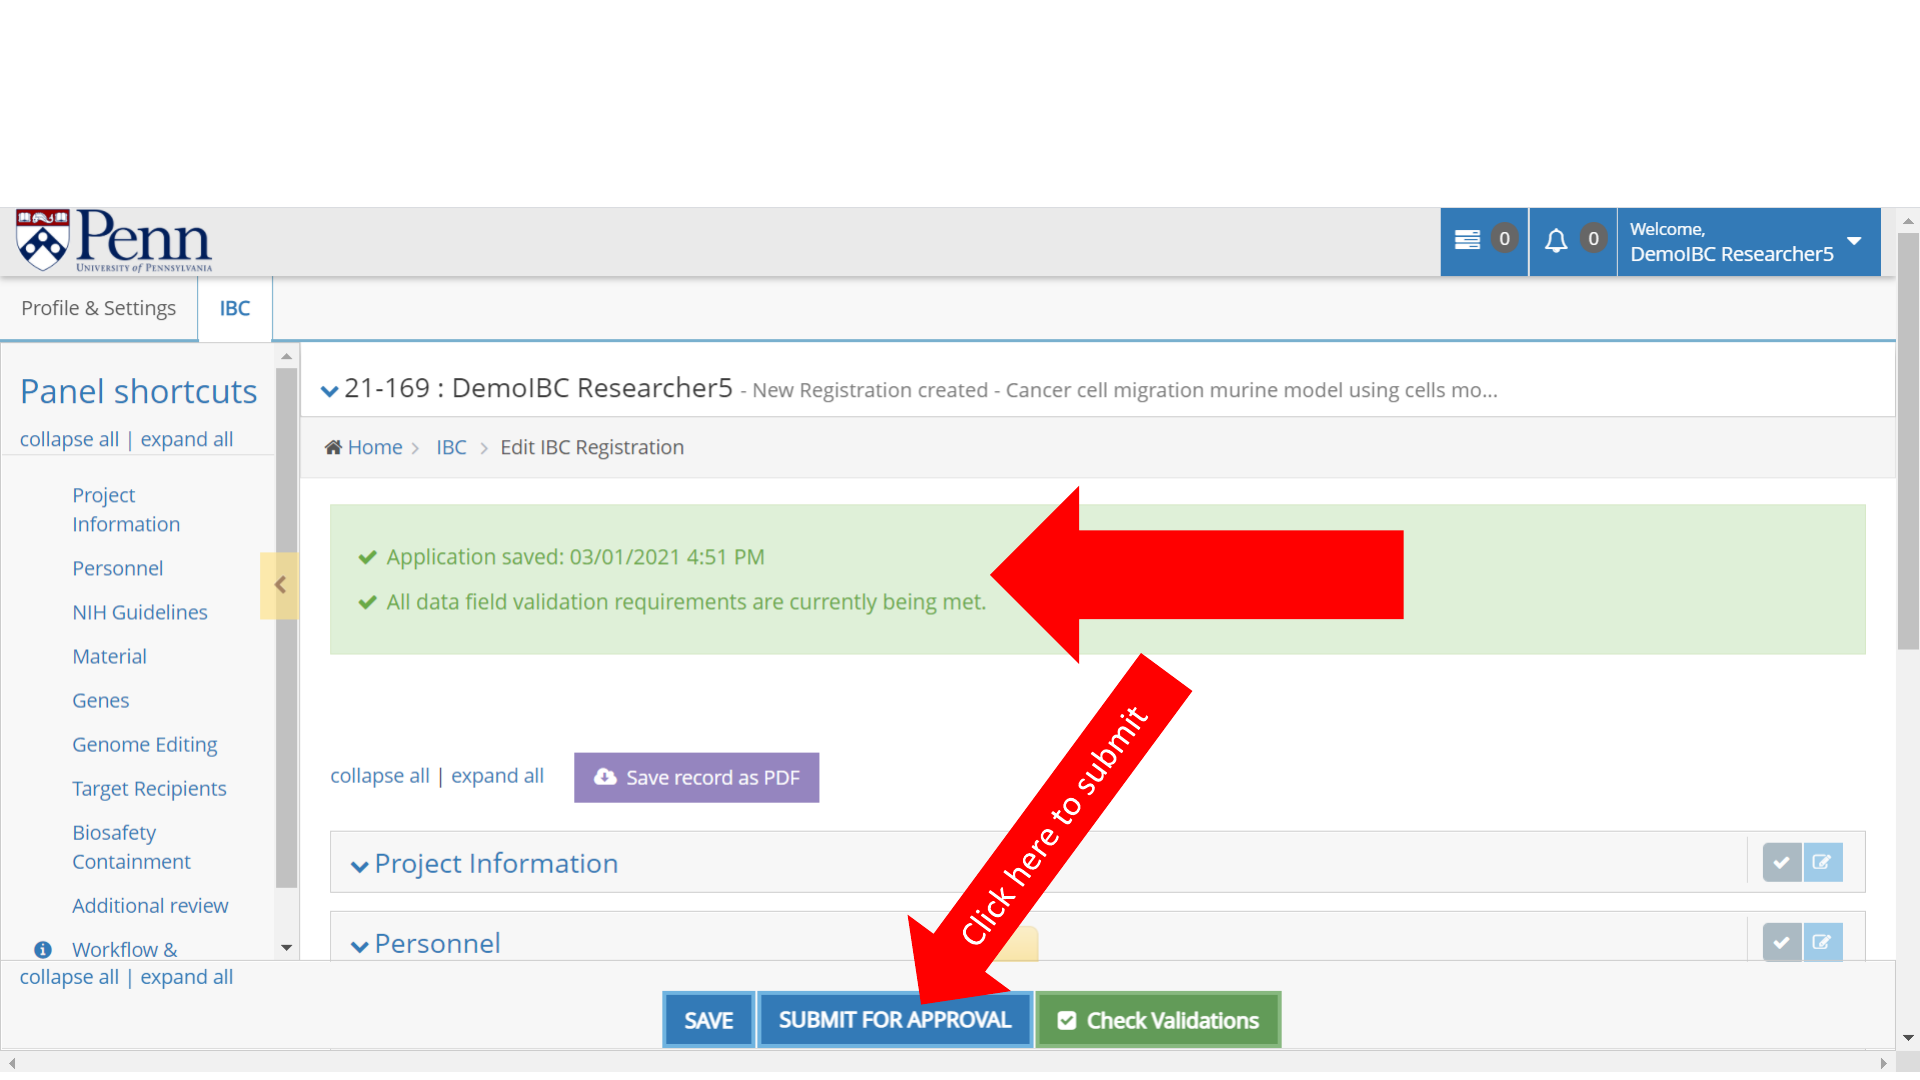
The registration has been saved. All data field requirements have been met so the registration
form has been completed. To submit the registration for pre-review, click the “Submit For
Approval” button.
Registration is saved
and complete
36

The registration has been successful submitted for pre-review. An email has been sent to the
assigned Biosafety Officer. The Biosafety Officer will pre-review the registration.
Success!
37

When pre-review is complete, you will receive an email. Login to the website. Access the “All
My Tasks” page. If this is not the landing page, access your tasks by clicking the tasks button (1).
To access the registration to review the pre-review comments, click on the task message (2).
1. Click here to access “All My Tasks” page
38

Once in the registration, click on “Review Comments” in the Panel shortcuts (1). To review specific
comments, click the “+” button (2). The conversation button can be used to respond to the
comment, if necessary (3). Click the “Section/Field” link to be taken directly to the section (4).
1. Click here
39

Once at the appropriate section, click on the red comment box to view the comment again (if
necessary). Make the appropriate changes.
40

If necessary, comments may be filtered by section and/or status. Once changes have been
made, click the “Review and Submit” button at the bottom of the page.
41

Click the “Confirm and Submit” button to continue with registration submission. An email will
be sent to the assigned Biosafety Officer.
42

After re-review is complete, you will receive an email prompting you to certify the
registration. Login to the website and navigate to the “All My Tasks” page. Click on the task
message to enter the registration.
43
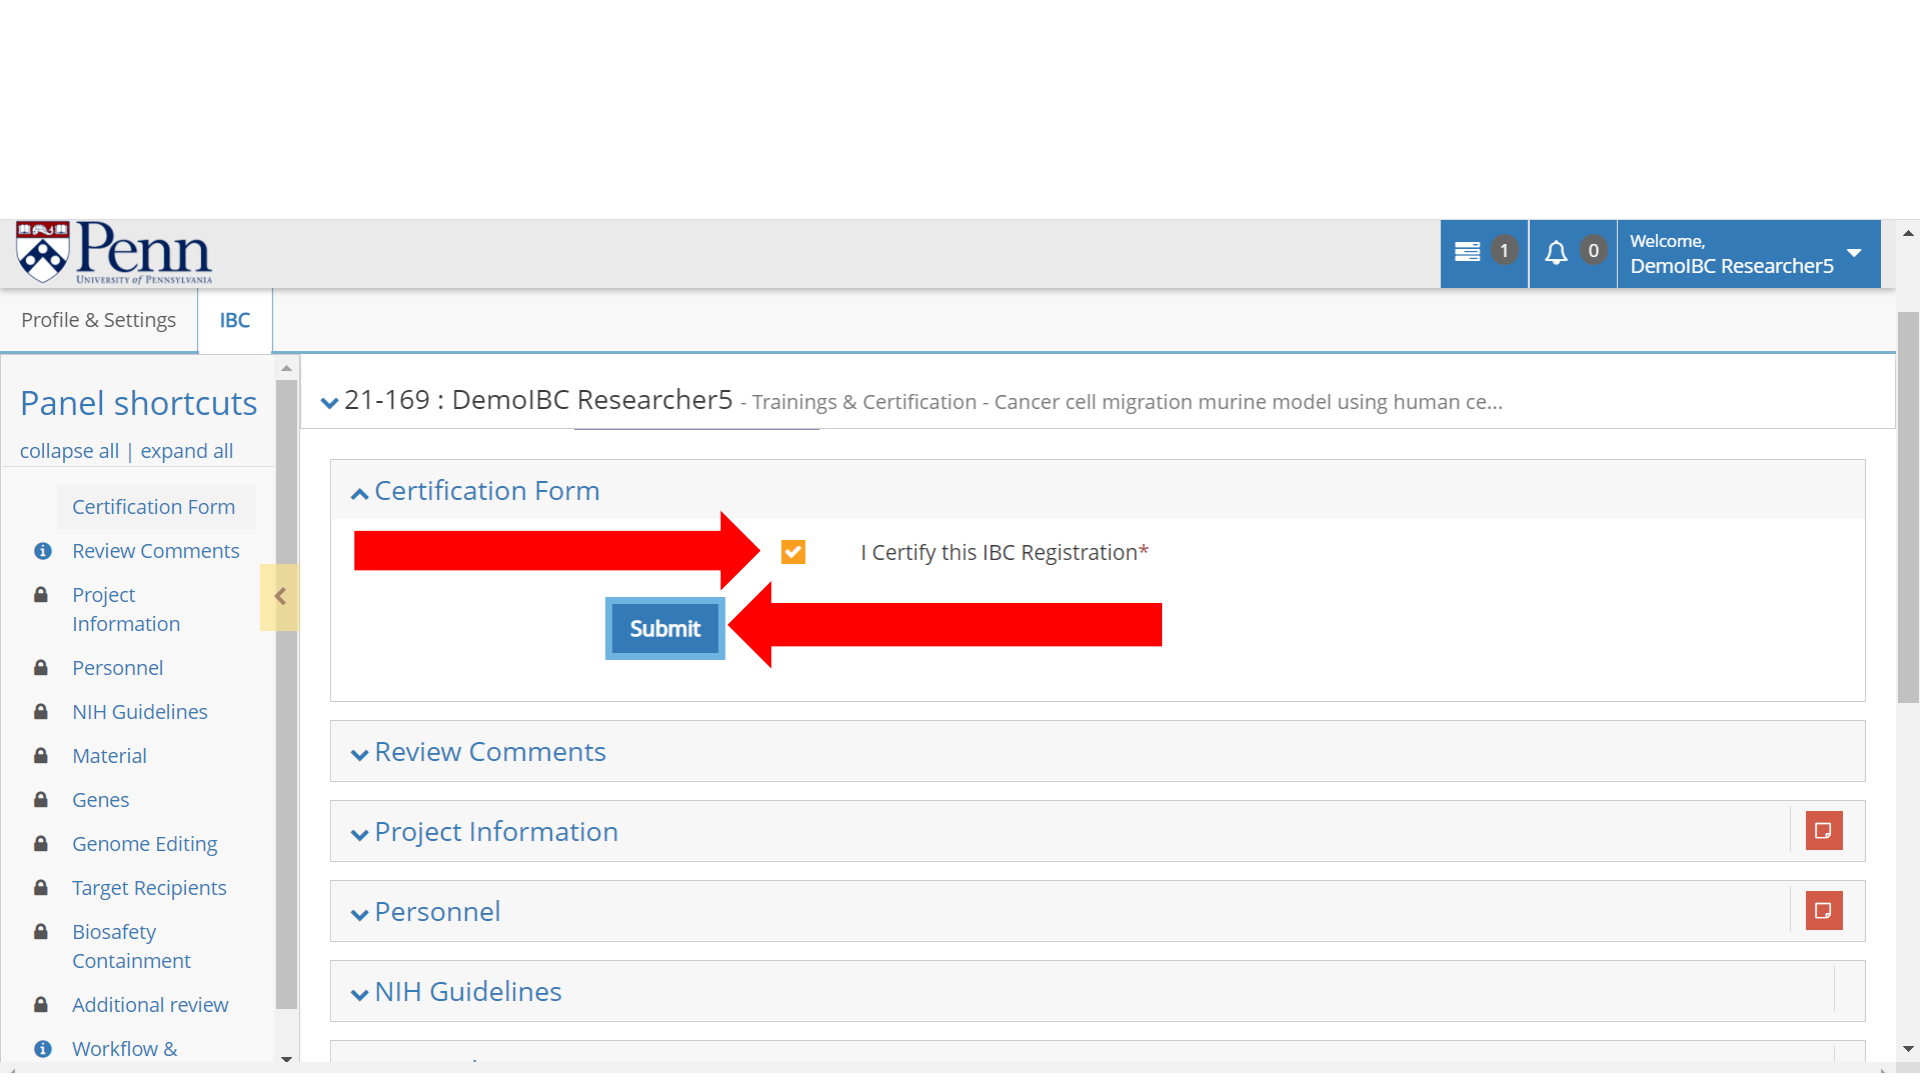
The “Certification Form” section will be at the top of the page. Click the “I Certify this IBC
Registration” box (1). Then click the “Submit” button (2). An email will be sent to the
assigned Biosafety Officer and the registration will be added to an IBC meeting for review.
1. Click here to certify
2. Click here to submit
44

What happens next?
• Your registration will be reviewed at an IBC meeting.
• Your registration will either be approved and you will receive an
approval letter OR your registration will require modifications. The
assigned Biosafety Officer will notify you of this decision through the
website.
45
